Reading time: 4 minutes
Can I also do the participant registration via the LineUpr app? We regularly get this question from our organizers. And, as almost always in life, the answer is a strong “it depends”. ?
If this registration also refers to a payment system for the billing of tickets or the automatic assignment to individual programme items and lectures, then LineUpr is, unfortunately, unsuitable for this purpose. However, if you are merely interested in collecting participant data, querying interests and clarifying arrival and departure information, then yes, you can do that with LineUpr. And now we’ll show you exactly how that works.
Create the Participant Registration
First of all, we need a way for participants to enter their data. For this, we use a classic survey. How to create surveys and what to consider is shown in this article.
For the title of the survey choose something like “Participant Registration”. Next, you need to think about what data you want to collect from your participants and what you want to know about them. Typically, here you ask for the name and contact details such as telephone number and email address. For such questions use the answer type Text Field.
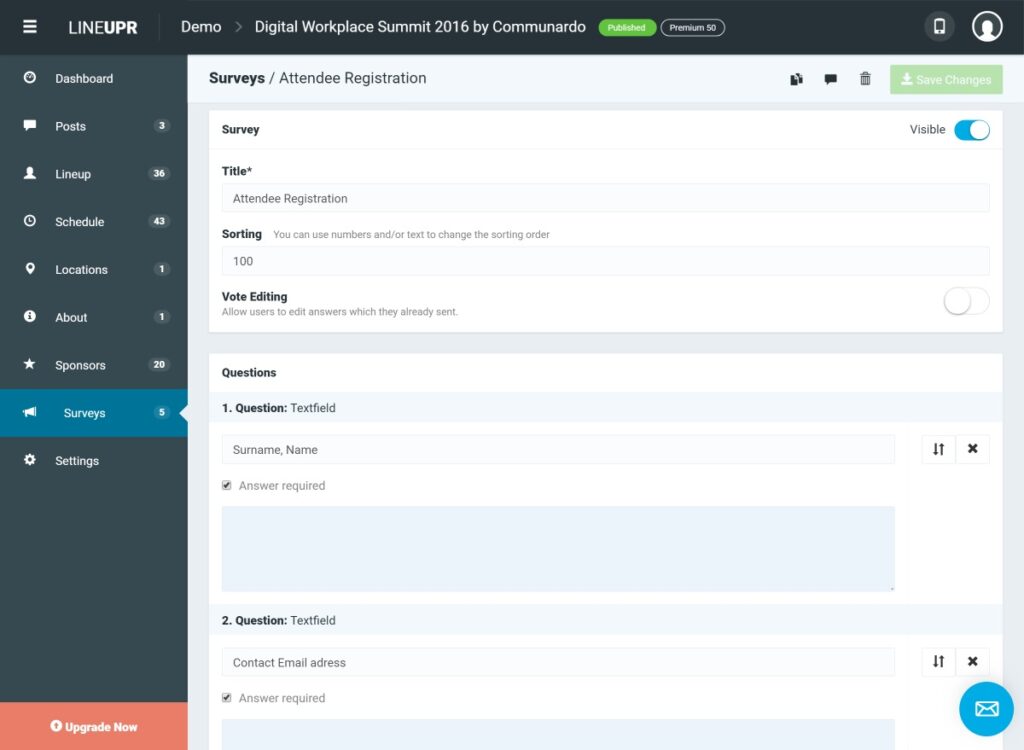
Besides that, you can collect a lot of interesting information about your participants. If you want to pick them up from the airport or train station, then ask for the arrival and departure times. Here you can work with the response types Multiple and Single Choice. Here your participants already make their first statement about which programme points they want to participate in. You can also ask them if you should book an overnight stay for them or you can ask about their food preferences.
You see, the opportunity to ask questions is very vast. So think about it before. ?
Here You Can Find the Participant’s Data
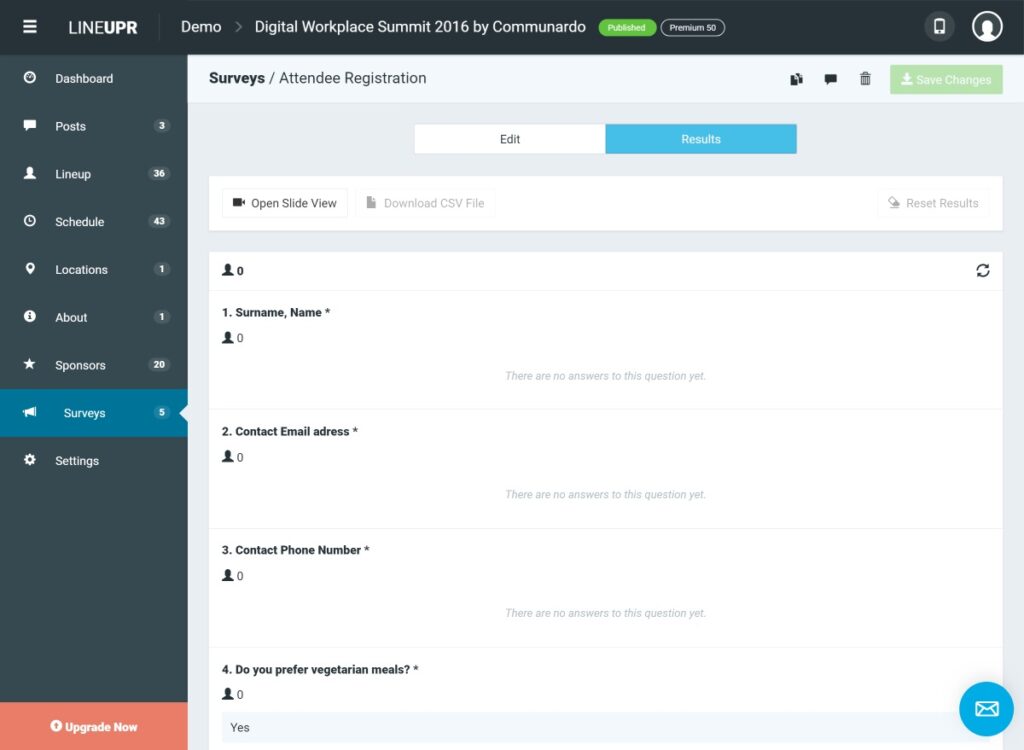
You can find the entries of your participants directly in the survey. To do this, first, log in to your Event CMS and click on the participant survey. This will automatically land you in the edit view. Now quickly click on “Evaluation” in the middle and you will see the entries of the participants. For a better evaluation, we recommend that you export the results by clicking on “Download CSV file”. Then you’ll have everything available as an Excel file.
Put the Participant Registrations in Focus
In our experience, it is essential to make it as easy as possible for the participants to enter their information. Therefore, we recommend placing the link to register directly on the home screen. Depending on which further information you want to present to the participants before the event straight on the home screen, it may be useful to delete all other menu items.
Often the participant registration takes place a while before the event. In this case, the participants have little or no interest in the other participants, the sponsors, the location or the programme. Here it makes sense, as long as the registration is still open, to only show the registration on the home screen of the app. To achieve this, log in to your Event CMS again and go via Settings in the “Menus” menu. Here you can define which and how menu items are displayed on the home screen. In this tutorial, you will learn what is possible here.
The Final Participant Registration
Now that we’ve been discussing this for a while, it’s time to show you what the registration might look like in the end. The first question is, how do your participants learn about the app? Quite simply, you can distribute the link via social media, by email or as a QR code on printed flyers/posters.
If you’re primarily concerned with the registration in the first step, then it’s best to use the direct link to the survey, not the generic URL of your app. How to find out the survey URL and share it is explained in our tutorial on linking surveys.
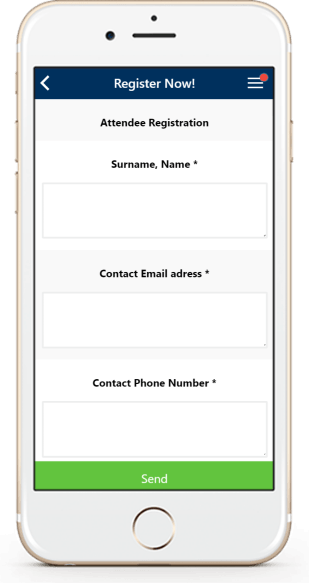
If your attendees open the survey link on a mobile device, they will be taken directly to the participant registration. But if they use a stationary device, then the home screen of the app opens first.

In the second case, the user must first click his way through to the survey. After one or two clicks, they will all end up on the page where they can enter their data.
As already discussed, all answers immediately land in your CMS and you can continue working with them.
What You Should Have Learned
In this article, we showed you how to use LineUpr to create a simple registration portal for your participants and evaluate the data in real time.

“Registration” Icon created by Healthcare Symbols from “the Noun Project“.