Reading time: 10 minutes
In this tutorial, we will deal in detail with the topic surveys. What types of surveys are there and how can you use them in the app? We will show you how to create feedback surveys, opinion polls and live surveys that allow your guests to ask questions directly to the speakers on stage.
The featured examples can be found, as always, in our demo app.
What types of surveys does LineUpr offer?
We offer a total of three different types of surveys, which are suitable for different purposes.
Survey: This survey type is the general survey feature that allows you to model different kinds of surveys. There are four types of questions available and you can theoretically create an unlimited number of questions per survey.
With this type of survey, our organizers typically set up feedback surveys and gather information from participants’ data and interests.
Live Poll: You would like to know more about your audience, or you want to integrate them into a presentation or into the event interactively? Then this is the perfect survey type for it. Here you can only create one question per poll and only the question types available are “star rating”, “single choice” and “multiple choice”.
Organizers use this type of survey to capture public opinion or to learn more about their participants’ interests or existing knowledge. With this information, the speakers can adapt their presentations and focus more on the participants.
Questions and Answers: You want to give your guests the opportunity to ask questions to the speakers directly via the app? Then use the survey type “questions and answers”. Unlike the other two survey types, users can answer this survey indefinitely, asking multiple questions to the people on the stage. The nature of this kind of question specifies that only one question can be asked and this question can only be answered in the form of a text field.
As the name implies, users should ask the people on stage questions using this question type. However, other organizers also use this type of survey to gather questions about the procedure or about the event- as a support channel, so to say.
What Types of Answers are Possible?
As indicated in the section about the different types of surveys, there are four types of answers available. You can use star ratings, single choice, multiple choice or text fields as the answer type for the surveys.
Star Rating: In the Star Rating, the user can give 1 to 5 stars for the question.
This type is particularly suitable for questions about a subjective assessment, for example, “How did you like the food?” Or “How did you like the hotel?”
Single Choice: With the single choice you define a question and give two or more answer choices. The user can now select one of the answer options.
This type is best suited to questions with clearly identifiable and previously known answers, in which the user may choose only one selection. In case of doubt, the user still has to commit to an option. The classic example here is selecting a person for a position.
Multiple Choice: With Multiple Choice, you define a question and give two or more answer choices. The user can now select one or more answer options.
This type is best for questions with definite answers, but where the user does not have to commit to one answer fully. The classic example here is the question of which topics should be discussed at an event.
Textfield: With the text field option, you define a question and the user can enter his answer in a text field without any specifications.
This survey type is particularly suitable for questions in which the answer is not previously known or where there should be no deliberate manipulation. The classic examples here are the questions “What did you like?” and “What did you not like?”
How to Create a New Survey
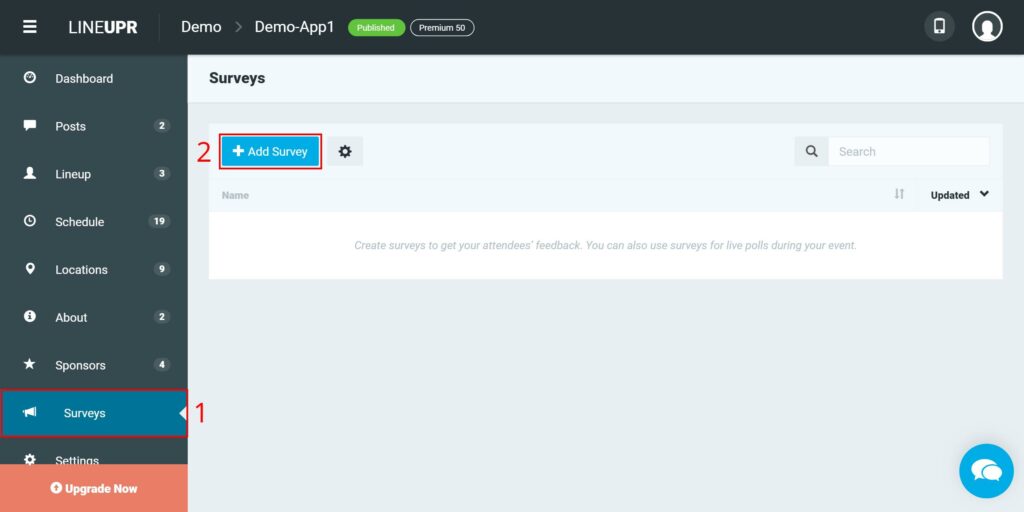
First, log in to your account and go to your event dashboard. Now navigate to the menu item “Surveys” (1) and start the compilation by clicking on “+ New Survey” (2).
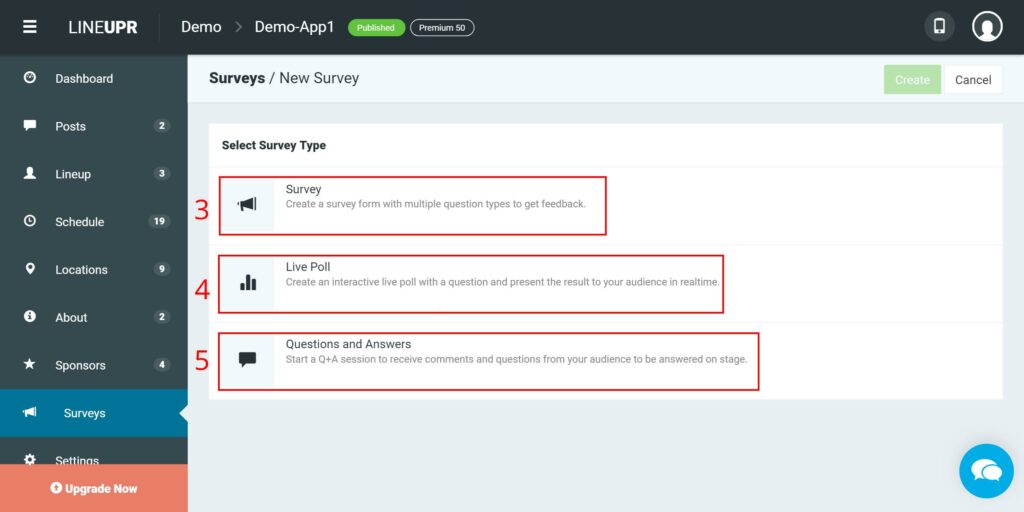
With “Survey” (3), “Live Vote” (4), and “Questions and Answers” (5), you now have the choice between three different survey types. The appropriate option in your case is dependent on the goal that you want to achieve with the survey. More about the different survey types can be found in the previous section.
How to Create a General Survey
If you have decided to use a “Survey” (3), a new page opens where you can now define questions for this survey. First, however, you must set a “Title” (6) for the survey. This title is also the name under which the users will see the survey in the app.
Next, you can specify a sort criterion (7). This is especially interesting if you are working with several surveys in parallel. Here you can define the order of the surveys in the app. Surveys with a “1” are shown at the top, and surveys with higher numbers are shown below.
You can also allow your participants to edit their answers later. All you have to do is activate the corresponding slider (8).
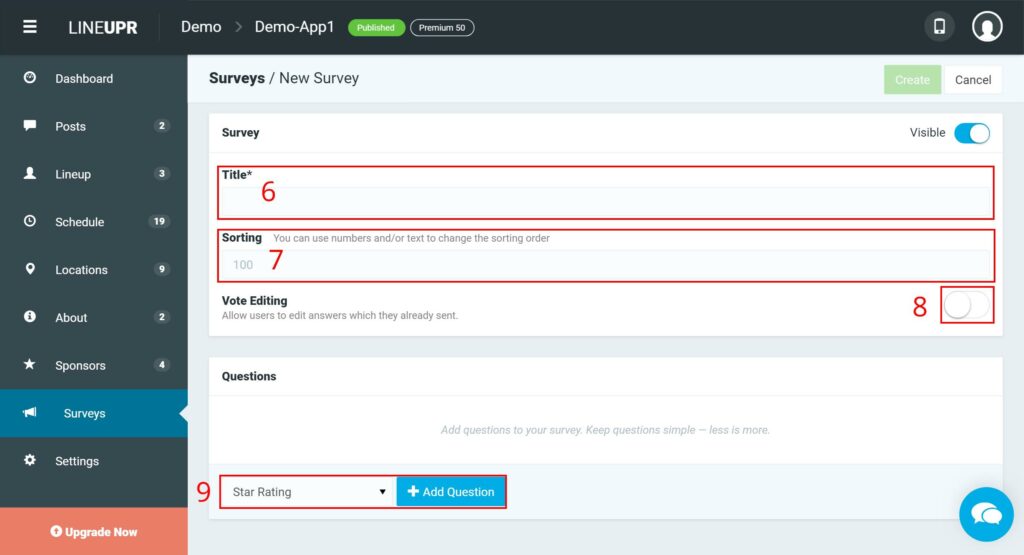
Let us now turn to the questions. As already described, in the general survey all four types of questions are at your disposal. To create a question, first, select the question type (9) and then click “+ Add question”.
Now define the actual question (10) and, depending on which question type you have chosen, also the answer options. You can add more answers to the question with “+ Add answer” (11).
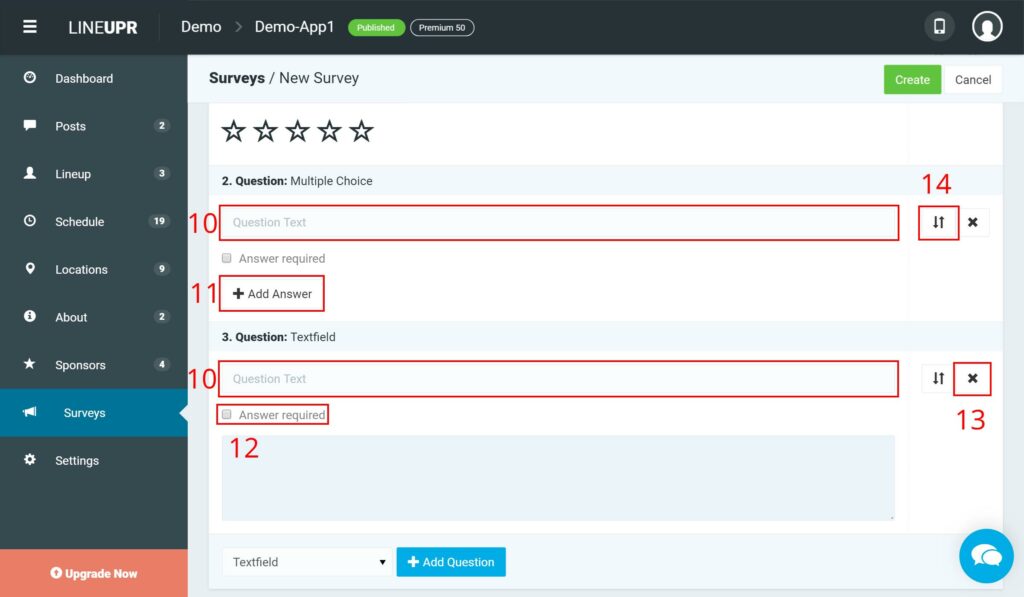
Besides, you still can specify whether a question needs to be answered by the user or not. If the button “Answer required” (12) is activated, then users have to answer the question to be able to submit their answers to the survey. For text field questions especially, we recommend that you do not activate this button and allow the user choose to enter their text as input or to submit it without doing so.
If you want to delete a question, click on the “X” (13) next to the subject. If you want to change the order of the questions, please use the opposite arrows (14) to move the item.
You can conclude the survey by clicking on the green “Create” button in the top right.
How to Create a Live Poll
If you opt for “live voting” (4), a new page will open where you can now define the questions for this poll. First, however, you must set a “Title” (15) for the survey. This title is also the name under which the users will see the survey in the app.
Next, you can specify a sort criterion (16). This is especially interesting if you work with several surveys in parallel. Here you can define the order of the surveys in the app. Surveys with a “1” are shown at the top, and surveys with higher numbers below.
You can also allow your participants to edit their answers later. For this, you only need to activate the corresponding slider (17).
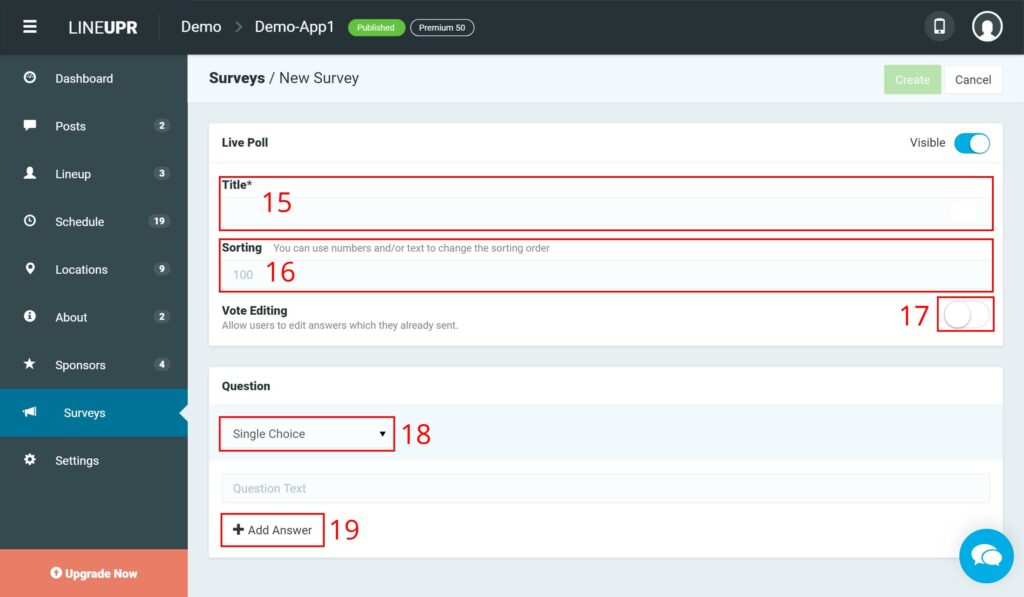
Let us talk about the actual questions. Unlike the general survey, you cannot use a text field here and you are only allowed to use one question per survey. So choose the right question type (18) and add, if necessary, answer options (19).
You can conclude the survey by clicking on the green “Create” button in the top right.
How to Gather Questions from the Audience
If you choose the Questions and Answers (5) option, a new page will open where you can now define the questions for this survey. First, however, you must set a “Title” (20) for the survey. This title is also the name under which the users will see the survey in the app.
Next, you can specify a sort criterion (21). This is especially interesting if you work with several surveys in parallel. Here you can define the order of the surveys in the app. Surveys with a “1” are shown at the top, and surveys with higher numbers below.
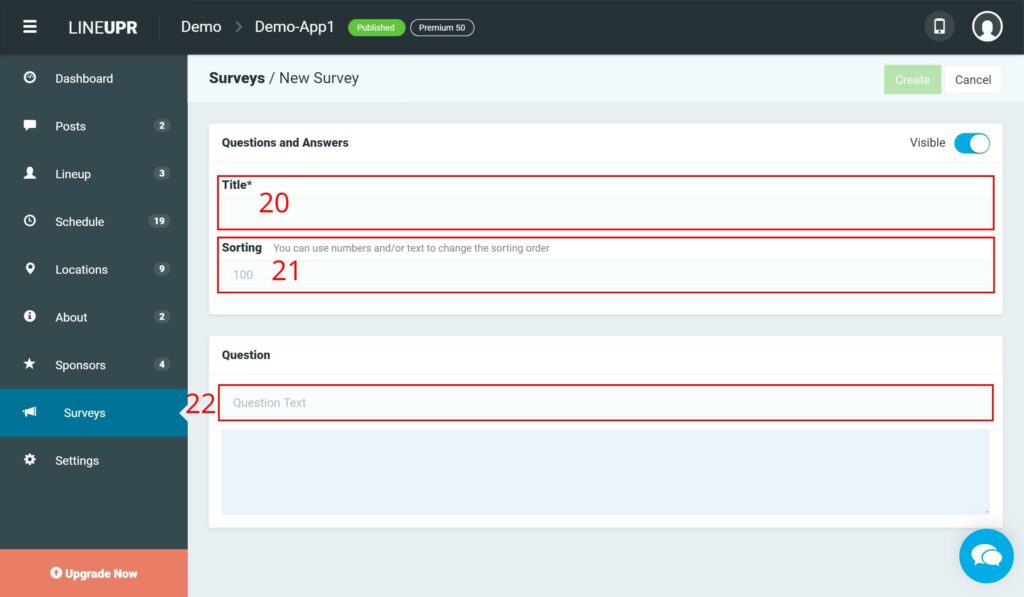
The Questions and Answers Survey allows you to only use the Textfield as the question type and allows only one question. Now enter a proper question (22), such as, “What questions do you have for me?”
You can conclude the survey by clicking on the green “Create” button in the top right.
Plan Surveys in Advance
Of course, you can also prepare all kinds of surveys but publish them later. Just set the slider (23) in the top right corner from “Visible” to “Invisible” and save it.
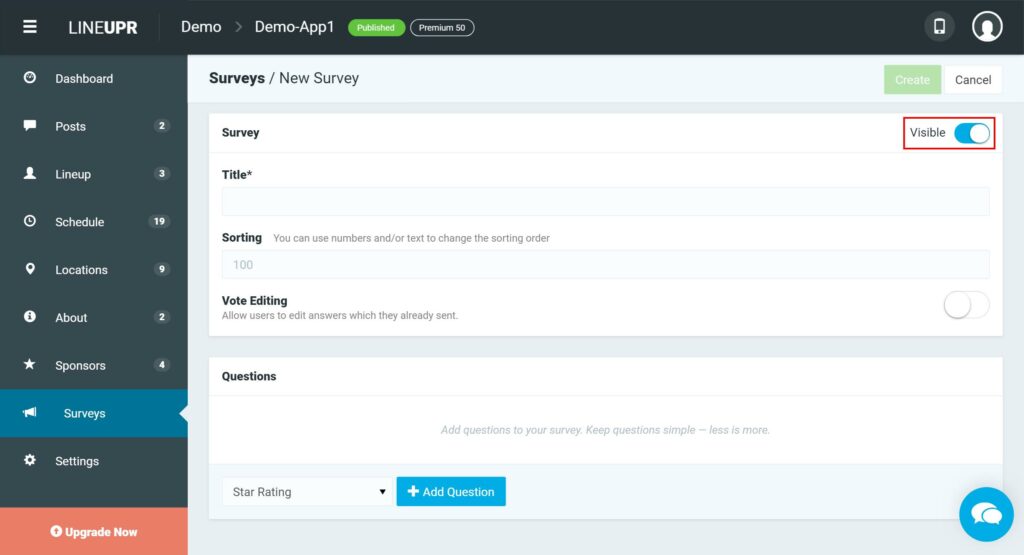
The survey has now been created, but it is still invisible to users. When the time comes, you can publish the survey live during the event by re-opening the survey in CMS and setting the slider (23) back to “Visible”.
What You Should Have Learned
In this tutorial, we introduced you to the different types of surveys and questions. Use this opportunity to receive feedback from your participants or to integrate them into your event interactively. Many participants have, for example, questions for the speakers, but do not dare to make this public. Here, the app offers you an intuitive and anonymous way. Through this interaction, your event will be perceived more positively and the connection between visitor and event organizer will be strengthened.
In the next tutorial, we will deal with the marketing of your event app. We’ll show you how to maximize the reach and usage among your guests. More on our blog.
“Poll” Icon created by Bakunetsu Kaito from “the Noun Project“.