Reading time: 7 minutes
In this tutorial, we’ll look at the color scheme of your LineUpr app in detail. We’ll show you how to integrate your corporate design and let the app shine in your colors. We will also show you how to integrate teaser and footer images into the app and select your own app icon.
In the second part, we will look at the settings of your event CMS for the first time and explain how to enter basic information for Google Search, how to customize basic event information such as title, date and URL, link it directly to your Google Analytics account, and define your imprint.
The featured examples can be found, as always, in our demo app.
Color Scheme – Corporate Design
You can determine the visual appearance of the app according to your ideas.
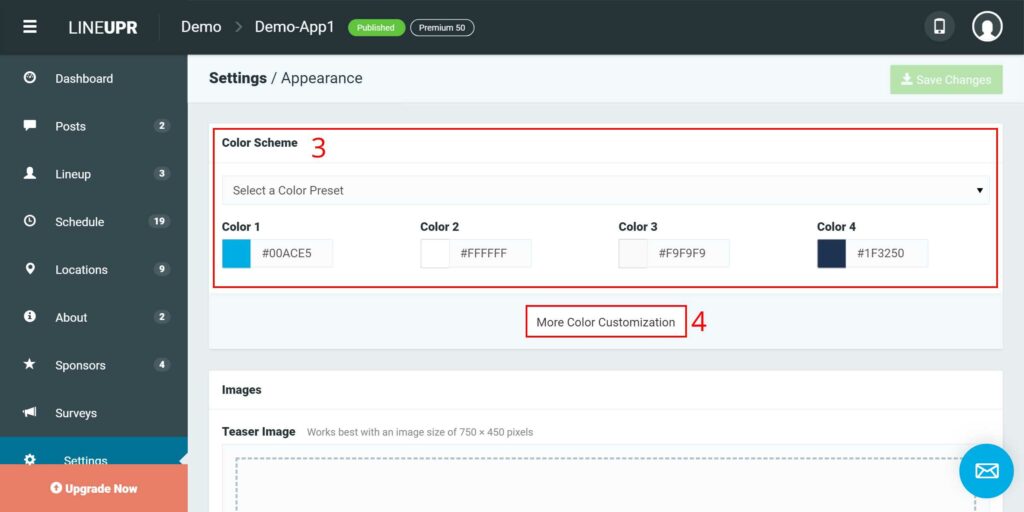
To do this, first, log in to your account and go to your event dashboard. Now navigate to the menu item “Settings” (1) and click on “Appearance” (2).

In the first block “Color Scheme” you can determine the colors of your event app. Depending on how deeply you want to deal with individual components of the app, you can use the simple option, where you can adjust only the four colors to your specifications, or you can choose the expert version, where you determine the colors individually for all subpages.
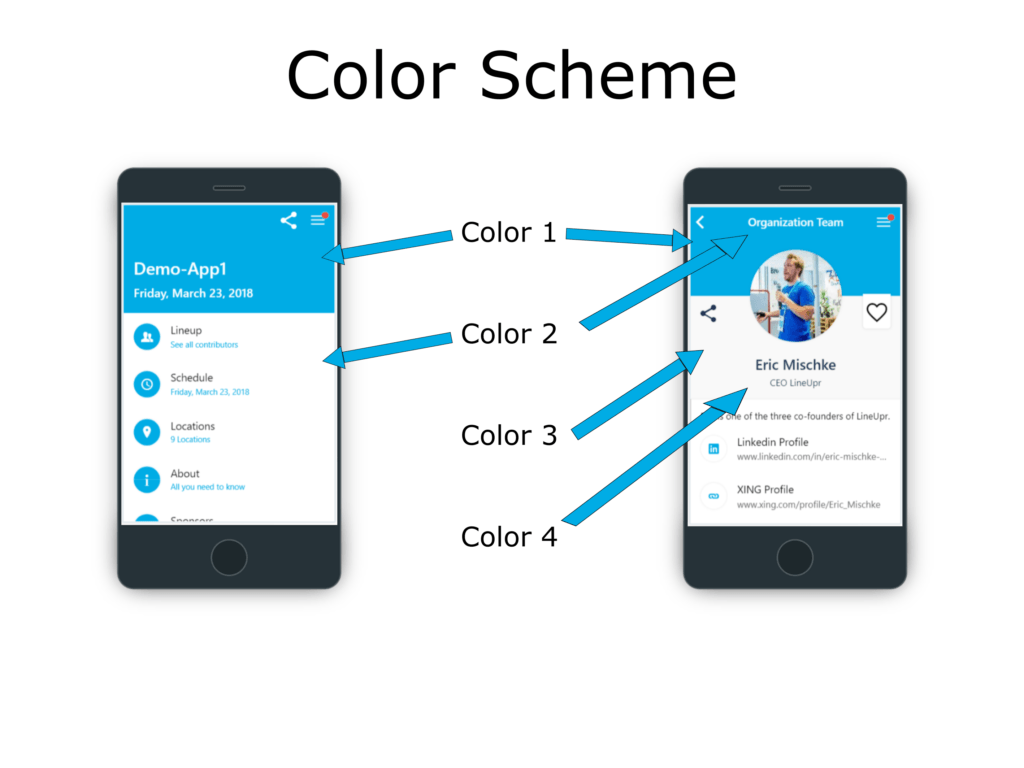
No matter which variant you choose, the basis is always the 4 “basic colors” (3). Here you can either search for your desired color in the color matrix or enter the hex code directly. In the standard scheme, the colors 1 (background) and 2 (font color) are the dominant colors and determine the colors of the start page of the app. The colors 3 (background) and 4 (font color) are only relevant for the subpages.
Here is a small practical example of where which colors are used:
Activate the expert mode by clicking on “More Color Customization” (4). Here you can independently set which color should be used for which font or background on individual pages of the app.
Teaser Image
The first thing your participants see when they open the app is the start screen. This is also the most visited page of your app. The start screen is the digital equivalent to the first page of your event flyer. Use this attention and utilize an appealing teaser image.
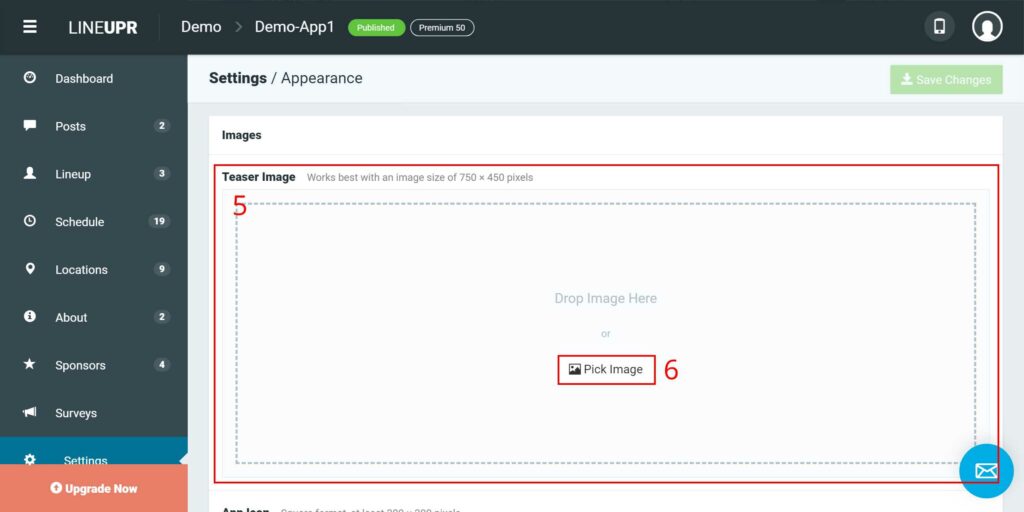
You can upload the teaser image in the second block “Images” under “Teaser Image” (5) into your app. For this, drag the picture either by “drag and drop” into the field or click on “Pick Image” (6) and on the next page in the upper left corner “Upload pictures”.
We support the image formats jpg and png. The optimal size for the title image is 750 x 450 pixels. However, other sizes and formats are possible. The app adapts automatically to the picture. Depending on the size of the picture, the menu shifts up or down, which may look less appealing. Our tip: Avoid pictures that are very long or very narrow in relation to the width.
App Icon
Your guests can also get the app directly on the home screen of their smartphones. All they have to do is bookmark the app. An explanation of how this works is presented automatically when the app is first opened.
Of course, you can decide to bookmark it later. To help quickly explain how to do this, we’ve created guides for the most popular browser apps in this article.
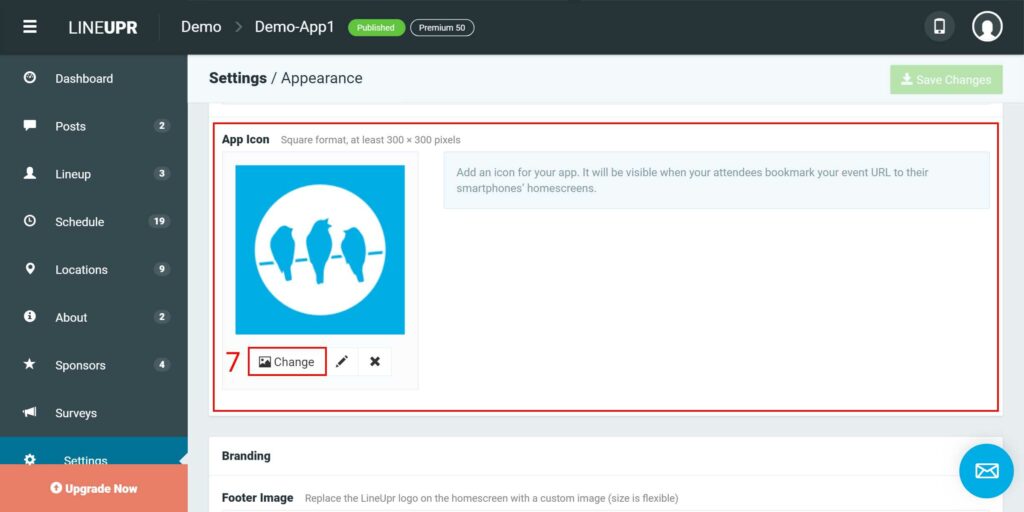
By default, our logo is set as the app icon. However, you can quickly change that by clicking on “Change” (7) and uploading your icon via “Upload Images” (top left corner).
We support the image formats jpg and png. The icon must be square and should have a minimum size of 300 x 300 pixels.
Footer Image
By default, our logo is displayed in the selected color scheme in the footer of the app on the start page. You can also integrate your footer image at this point and even link an external source. Many of our customers integrate their company logo here and a link to their homepage.
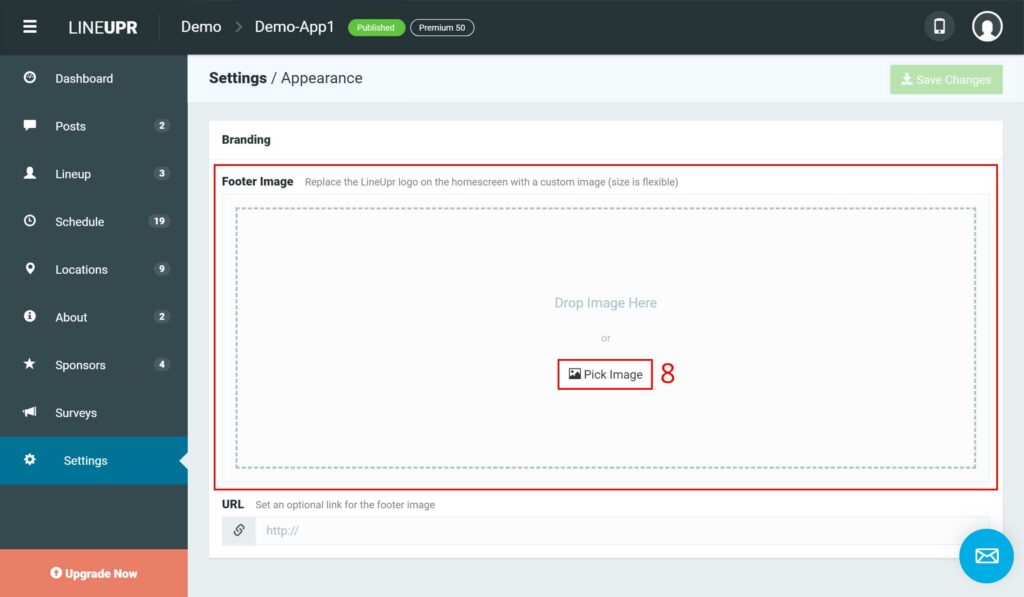
You can drag and drop the footer image into the field or click on “Pich Image” (8) and on the next page in the upper left corner “Upload Images”.
We support the image formats jpg and png. The optimal size depends on the picture. The app automatically adapts to the height of the image.
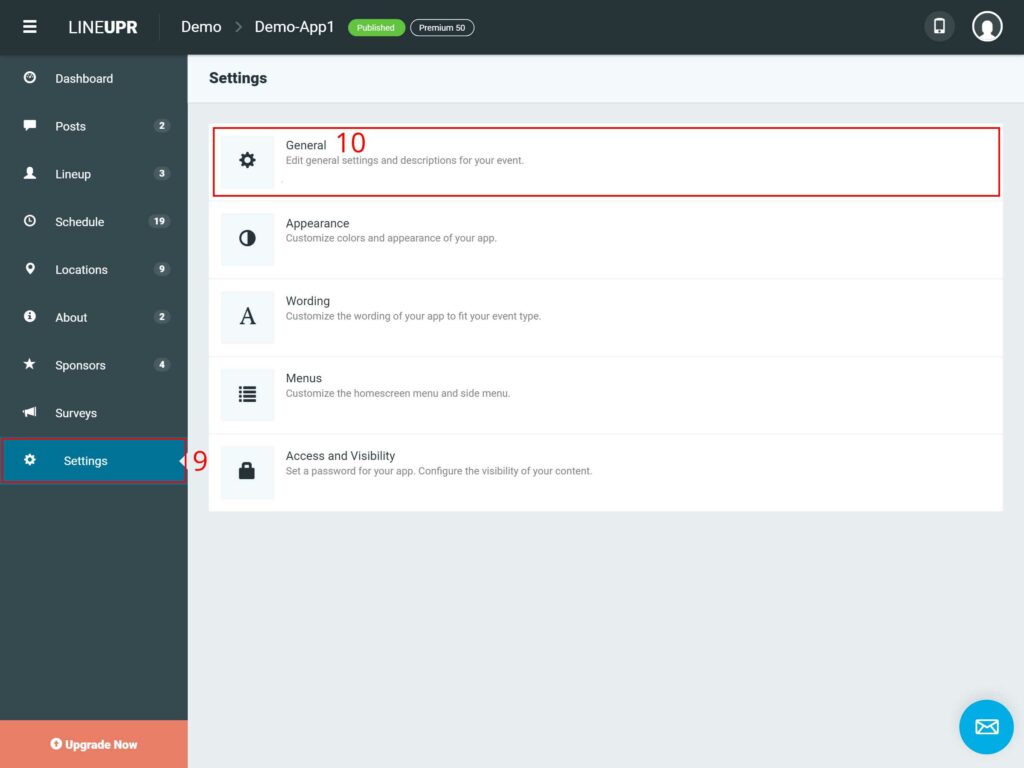
General Settings
After the app is a visual highlight, it comes to the basic settings. To do this, first, click on the menu item “Settings” (9) and then on “General” (10).
“Name” (11)
Here you can customize the name of your app/event.
“Event URL” (12)
Here you can customize the last part of your app URL.
Just as a reminder, the link to your app is structured like this: lineupr.com/Organisername/Eventname. Under “Event URL” you can adjust the “event name”. We always advise you to use short phrases, because some participants copy the link to the event or type in it by hand.
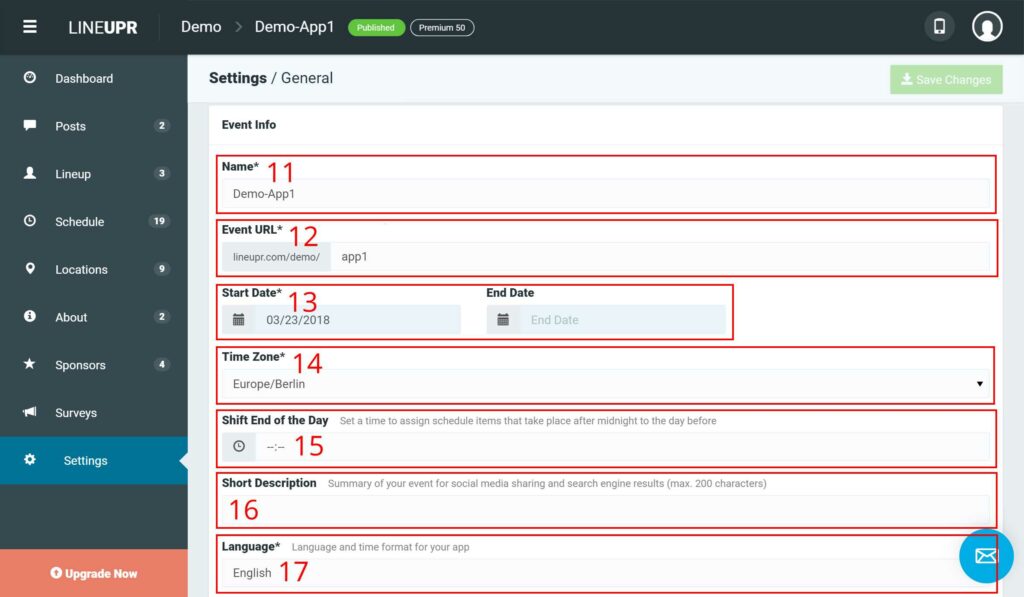
“Start and End Date” (13)
Here you can determine when your event starts and when it ends. The end date is optional and does not have to be entered by you.
“Time Zone” (14)
Determine the time zone of your app.
“Shift End of the Day” (15)
This feature is primarily for festivals and events that go into the night.
Normally, the transition from one day to the next in the app always takes place at 00:00 hours. Especially at festivals, some artists also appear at 01:00 a.m., etc. It is disturbing for the user experience if you would have to first switch this programme item to the next day in the app.
To solve this problem you, yourself, can define when a day starts and when it ends. So, if, for example, you enter 02:00 a.m., then programme items that start at 01:00 a.m. will still count as the day before.
“Short Description” (16)
This text is especially important for the search engine results and links in social networks. Here you can describe your event in a few words.
When searching for your app on Google this text, among others, is searched and also displayed under the link on Google.
If you link your app to social networks, then the text will be displayed below the image for the app.
“Language” (17)
As the title suggests, here you can define the language of the app. We currently offer German, English, French and Hungarian. Other languages like Spanish and Turkish will soon follow.
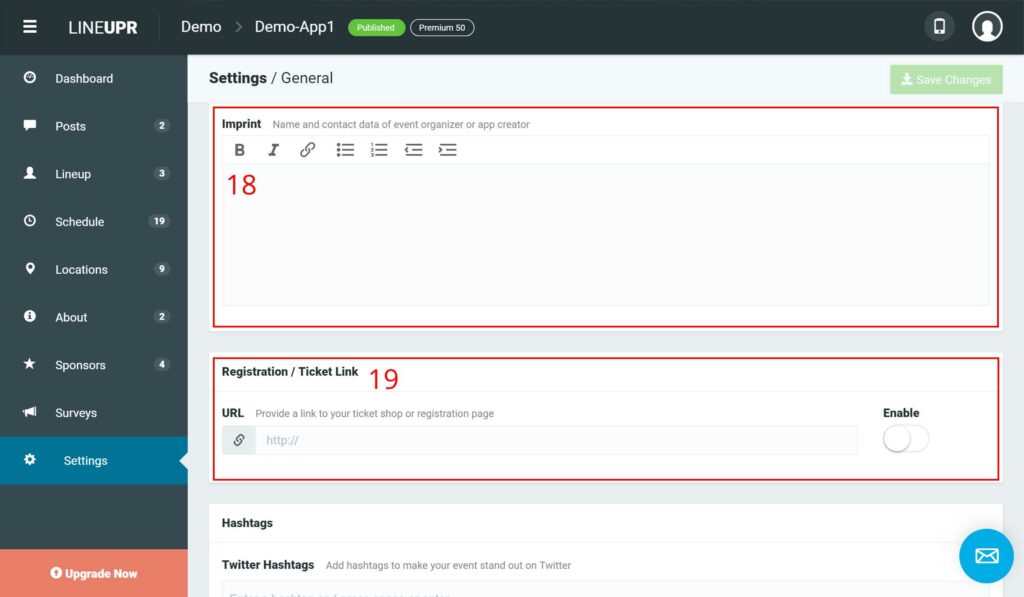
“Imprint” (18)
Here you can display your imprint. Since apps are rated as homepages, an imprint is always mandatory. We will share this imprint field in the published app. We take responsibility for the technical delivery of the app and you for the content.
“Registration / Ticket Link” (19)
Here is a particularly powerful spot to present a link in the app. If you use this feature, this link will appear on the app’s homepage between the teaser image and each item in the Start menu.
Many promoters use this feature to promote the ticket or sign-up link directly through the app.
“Hashtags” (20)
Your participants can share the app independently via their networks. If you post one or more hashtags, then these hashtags will always be automatically included with this share, so that a common stream can be created on the respective channel.
Please enter your keyword without the hashtag symbol. This will be added automatically. Of course, you can also work with several keywords.
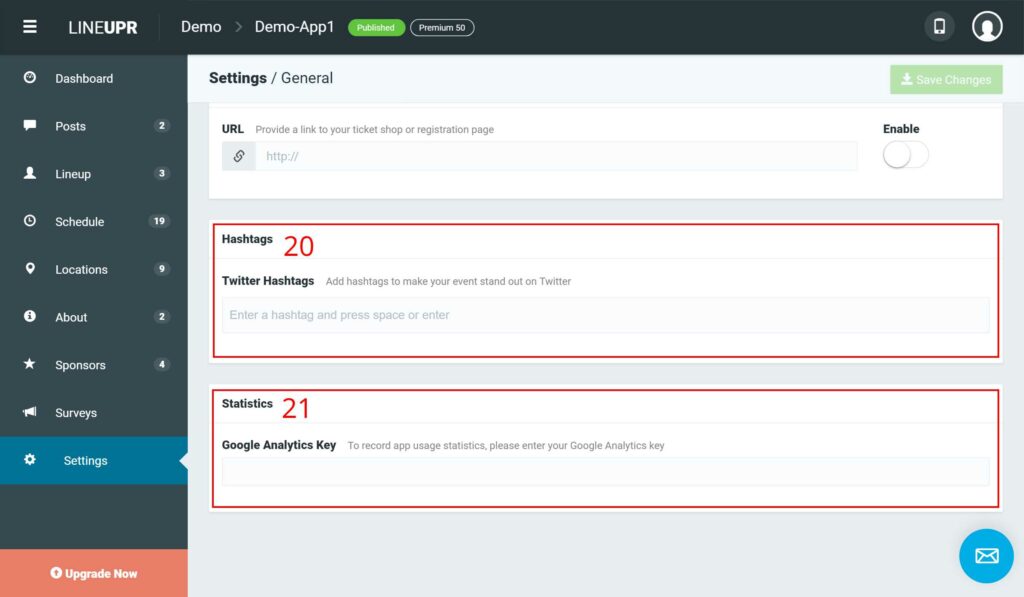
“Statistics” (21)
Do you want direct access to the statistics of your app? No problem. You can either create a new Google Analytics account or use an existing one and generate a key there. You can display the key in this field. Now you can analyze the usage of your app in your account.
What Should You Have Learnt
In this tutorial, we introduced you to how you can make the app look like your own. Use these options to make your participants enjoy the experience even more.
Additionally, in the second part, we showed you the general settings in the Event CMS. You should now be able to display your hashtags, link your app to your Analytics account, or customize the event URL yourself.
In the next tutorial, we will deal with the subject of individualization again. This time it will be about how you designate names in the app and the structure of the menu. More about this can be found on our blog.
“Design” Icon created by Ryan Beck from “the Noun Project“.