Reading time: 4 minutes
In this tutorial, we will deal in detail with about pages. We’ll show you how to create them and the purposes for which you can typically use them. In the second part, we will deal with the visibility of your content, for example using a password, so that only selected users can use the app.
The featured examples can be found, as always, in our demo app.
What are About Pages and How Do I Use Them?
About pages let you display specific types of content on a single subpage. Of course, you can also link this page directly to your app’s home screen. Because of their flexibility, the individual pages are predestined for any information that cannot primarily be assigned to the lineup, the program, the location or the sponsors.
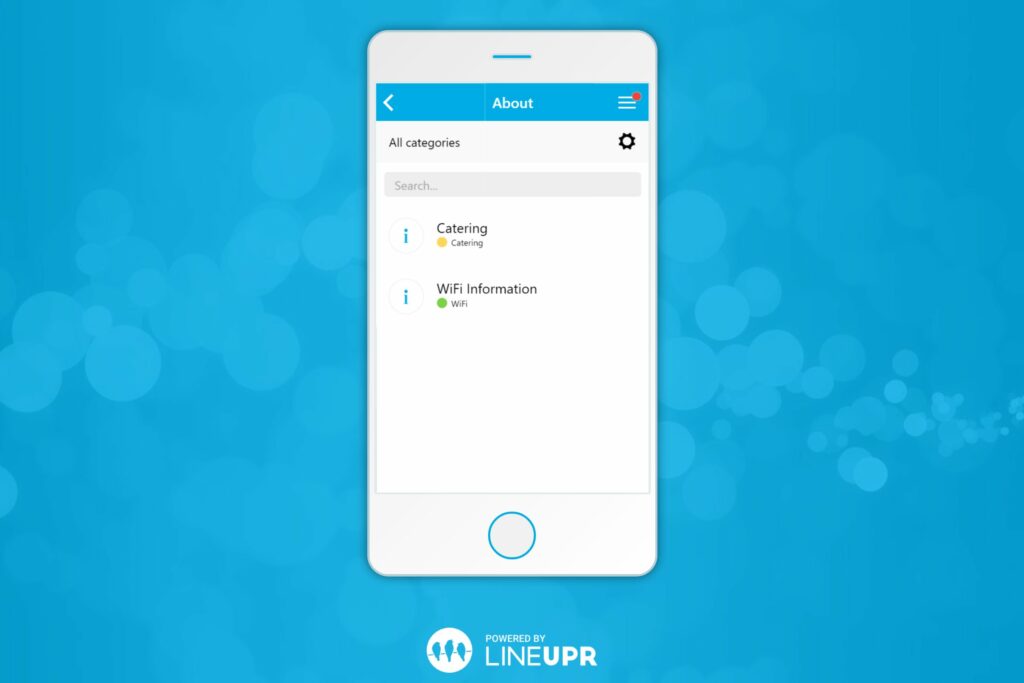
The perfect example of such an about page is the Wi-fi data at the venue. Many of our customers use this page to communicate to participants about the network name and password for accessing the event’s Wi-Fi network. Other organizers use this opportunity to present a few introductory words. The catering offers are also usually displayed here.
Creating an About Page
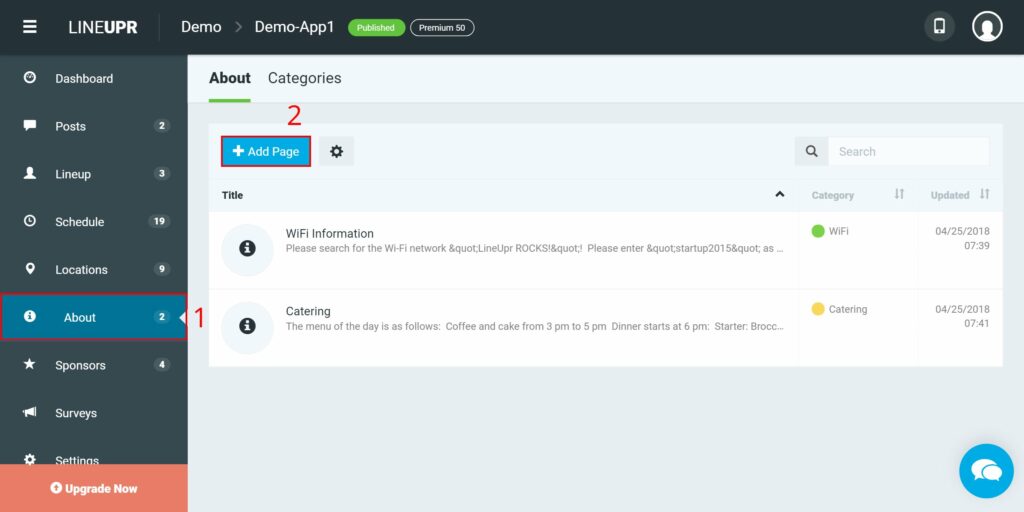
First, log in to your account and go to your event dashboard. Now navigate to the menu item “About” (1) and start the compilation by clicking on “+ Add Page” (2).
You are now in the exhibition view. Strictly speaking, all you have to do is enter a “Title” (3) and you can publish this single page by clicking on “Create” (4).
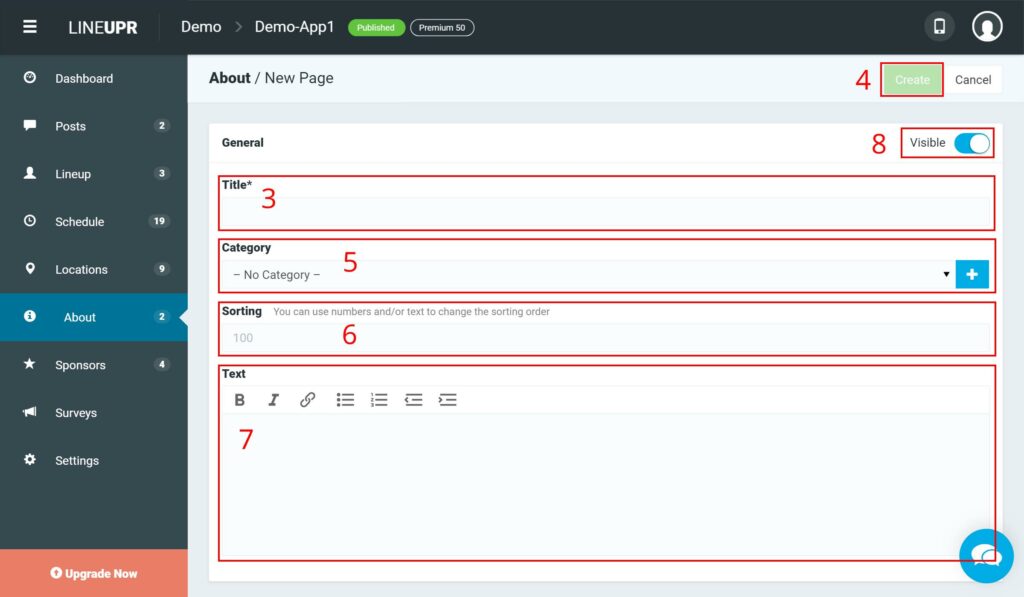
As the name suggests, an about page has a bit more information than a title. Use the text field (7) to communicate a message to your participants. For text creation, we provide a simple text editor that allows you to create bullet points, bulleted lists, and links, as well as writing in bold, italics and underlining.
If you work with several about pages, or you want to display a page directly on the start screen of your event app, you need to work with “Categories” (5). You can create such a category directly using the plus icon to the right. Find out more about the categories and how to create and edit them globally in the app, in this article.
Also, we also offer the option to sort your info pages according to your pattern. Use the field “Sorting” (6) for this. The sorting is done alphabetically. Numbers are listed before letters and the lower the number, the higher up the page it is displayed.
Of course, you can also set about pages to invisible and publish them only when the right time comes. Use the slider on the top right and set it to “Hidden” (8).
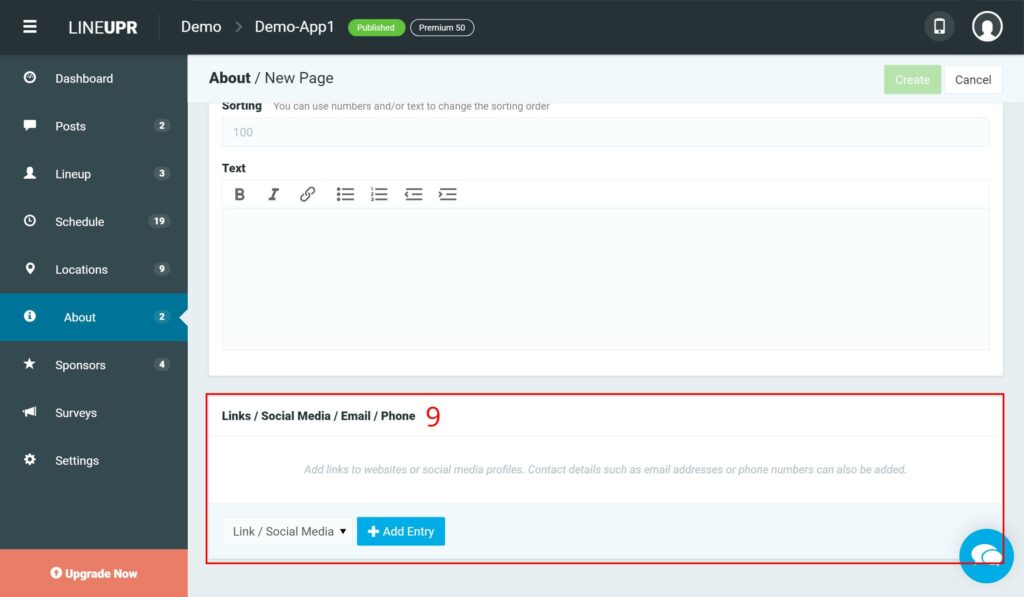
Additionally, you can include more information (9) such as contact information and links to external websites and social network profiles on the about page.
To integrate such information, first choose to add a link, email address, or phone number, and then click “+ New Entry.” Then quickly enter the data and you’re done. Please note that a link must be entered completely, starting with http: //. Same applies to telephone numbers with the area code. You can also specify in the “Description” field under which title the respective link will be displayed.
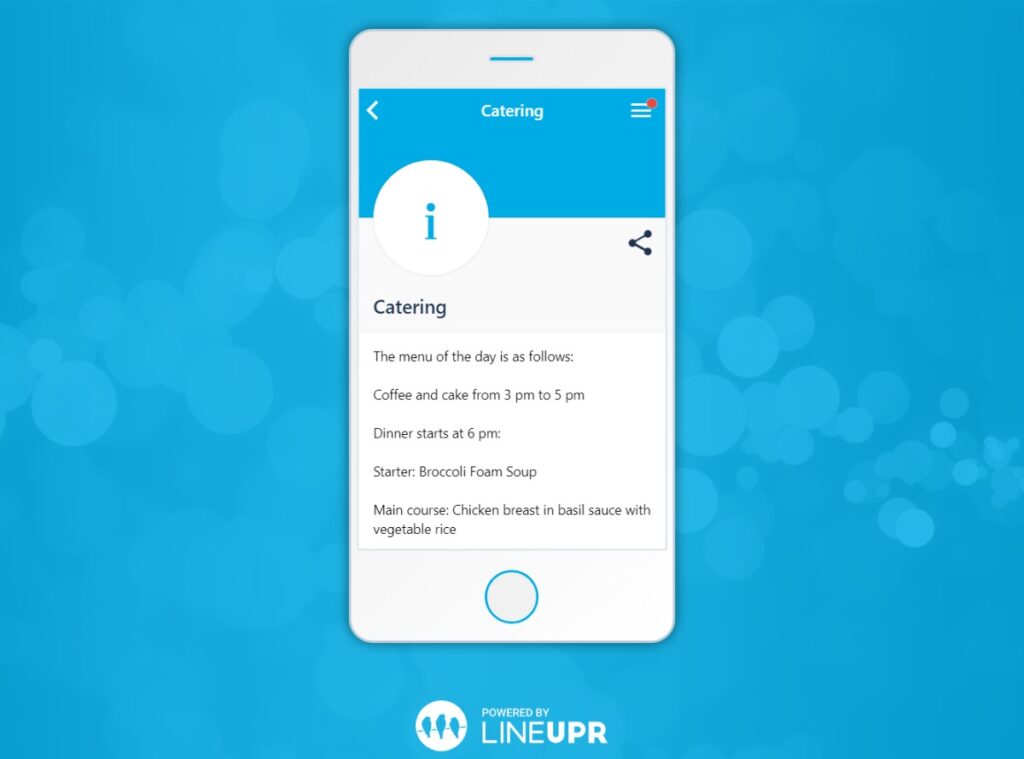
An about page could look like this:
Defining the Visibility of My App
We offer three options for accessing your app and determining the visibility of your event app by yourself.
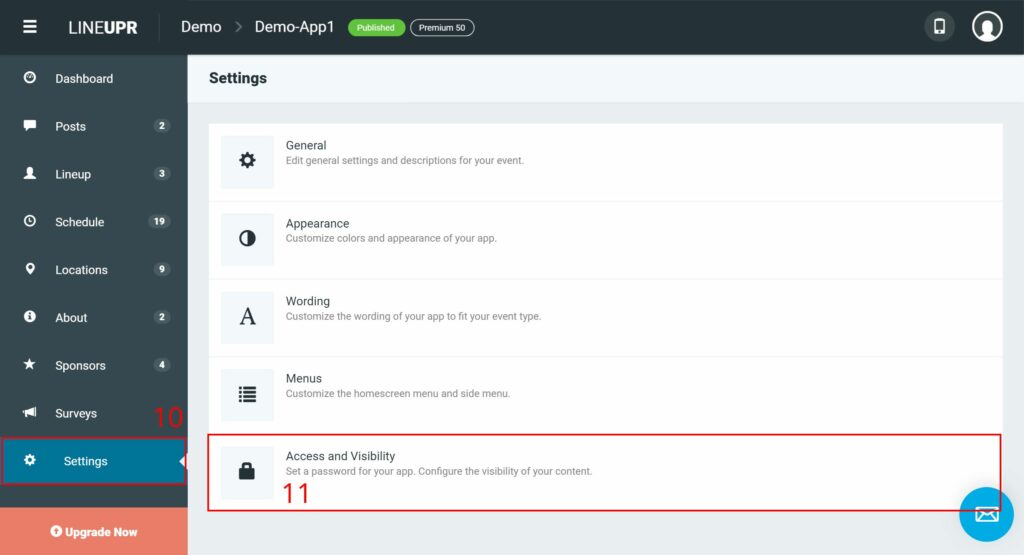
To do this, navigate to “Settings” (10) in your Event CMS and then “Access and Visibility” (11).
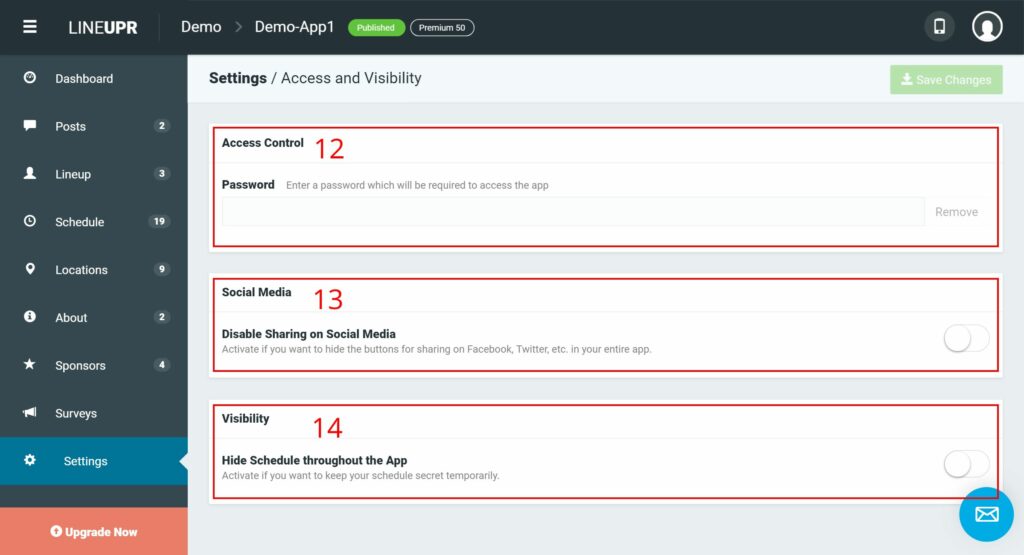
“Access Control” (12): Define a password for your app. Users will now need to enter the password before being able to see the contents of the app. This allows you to protect sensitive data in your app and to determine the circle of users.
“Social Media” (13): Do you want participants to share your app on social networks? If this is something you don’t want, then activate the slider. The sharing feature in the app will be turned off.
“Visibility” (14): If you want you can set your whole program with one click to “invisible”. Originally developed for festivals, many business events also use this feature. If you, for example, do not want to publish your exact program but still want to present your speakers and information about the app. Activate the slider and your program is set to “Invisible”.
What Should You Have Learned
In this tutorial, we showed you how easy it is to create one or more about pages for your app. Use this feature to display special information on a separate page.
In the second part, we showed you how to define the circle of your app users with a password, hide the entire program and prevent sharing your content on social platforms.
In the next tutorial, we will focus on how you can integrate your specific corporate design into the app and turn it into a successful marketing tool not only in terms of content but also visually. We’ll even briefly talk about necessary app search engine information, how to use hashtags, and how to integrate Google Analytics. For more on our blog visit https://blog.lineupr.com/en/category/lineupr-tutorial-en/
What is your opinion on our about pages? For what information do you use this page in the app? We are looking forward to your feedback.
“Password” Icon created by Thays Malcher from “the Noun Project“.