
Reading time: 6 minutes
Imagine: You have just added a talk to the program. Though the speaker would like to have feedback, e.g. to work on his presentation style or to adapt the contents of the talk to his audience. Also, he wants to interact with the visitors of your event through a live survey and to ask their opinions on the topic of his talk. Here is another example: the speaker has sponsored your event and his company with its information is already displayed as a sponsor profile in the app. How do you link that all together when 20 other speakers also want to have feedback, live surveys and Q&As? The guests will completely lose the overview!
But there is no reason to panic! The old hands have already used a little trick for that. Finally, we’ve got a new feature for you so that you no longer must search for the URLs of such content and even a “beginner” can deal with it. You can easily add linkage to other sections of the app and create shortcuts.
We will show you step by step how this works.

Creating a Link to Individual Entries
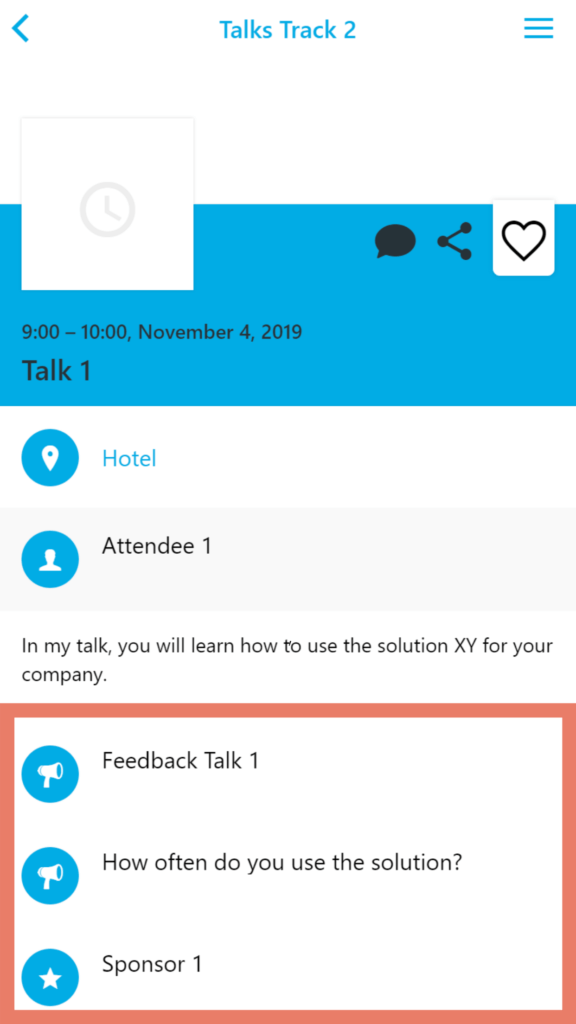
In order to link individual contents – for example a survey in a program item – proceed as follows:
- Open the entry in which the link should be displayed.
- At the very bottom of the page, go to the “Links / Social Media / E-mail / Phone” section and select “Link to Entry” from the drop-down menu.
- Confirm your selection by clicking on “+ Add”.
- A new link will be added. From the drop-down menu with “Select Section” placeholder select the main category from which you want to link content – for example, “Surveys”.
- In the text box to your right you can start entering the title of the content to be linked.
- Select the content to link from the suggestions. Note! The name of the entry becomes the name of the link. This cannot be edited in retrospect.
- Save the link by clicking on “Save changes” in the upper right corner.
Creating a Link to the Lists
Another case: You have created an attendee list in the Lineup and these (or only a part) need to be assigned to one of your program entries. For example, only participants belonging to the category “Group 1” can attend Workshop 1.
You can also link a list of sponsors for promotional purposes with a program entry, e.g. sponsors of the “Gold Sponsor” category will be displayed in the program.
- Open the program point in which the link should be displayed.
- At the very bottom of the page, go to the “Links / Social Media / E-mail / Phone” section and select “Link to Section” from the drop-down menu.
- Confirm your selection by clicking on “+ Add”.
- A new link will be added. From the drop-down menu with “Select Section” placeholder select the main category from which you want to link a list – for example “Lineup”.
- In the second drop-down menu to the right you can now – if necessary – filter with existing categories – for example “Group 1”. Note! The name of the category becomes the name of the link. This cannot be edited in retrospect.
- Once you added your link to the list, save your progress by clicking on “Save Changes” in the upper right corner.
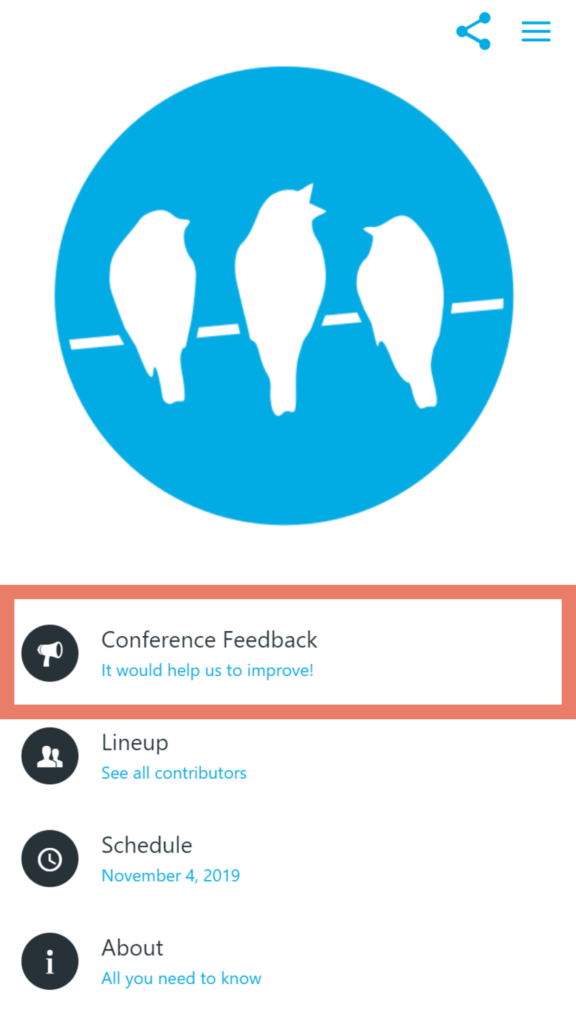
Creating a Link for Individual Entries on the Home Screen
Do you want to collect feedback on your event? Then you need to attract the attention of your attendees. The easiest way is by linking your feedback sheet to the start menu. To do that, proceed like this:
- Click on “Settings” in the menu to your left and then on “Menus”.
- From the drop-down menu at the bottom of the page, select “Link to Entry” and add it to the menu with “+ Add” button.
- A new link will be added. From the drop-down menu with “Select Section” placeholder, select the section from which you want to link content – for example “Surveys”.
- In the text field to your right you can start to enter the title of the content to be linked.
- Select the content to be linked from the suggestions.
- You can now decide whether the link should be displayed on the start page or whether it should only be accessible via the side menu; where the feedback entry should be placed (move it up and down with the drag and drop button) and if you want to set a custom subtitle. Note! The name of the entry becomes the name of the menu. This cannot be edited in retrospect
- Save the menu by clicking on “Save Changes” in the upper right corner.
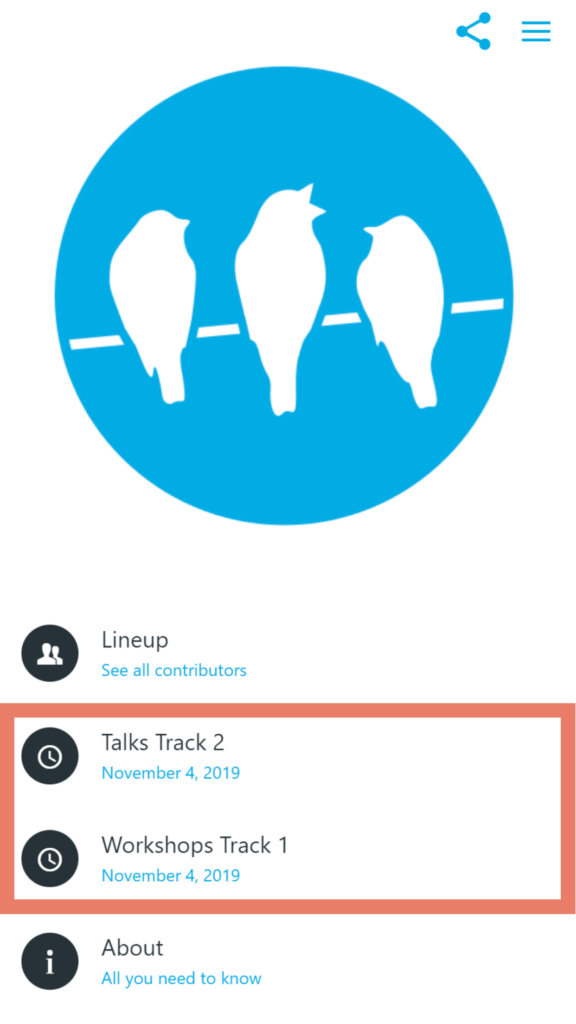
Creating a Link for the Lists on the Home Screen
Here you can create additional menu items or filtered lists. Let’s say you have two different program tracks and you tagged them only with categories and you’re worried that your participants might get confused. Here you can create an additional menu item and make two programs out of one. To do this, proceed as follows:
- Click on “Settings” in the menu to your left and then on “Menus”.
- From the drop-down menu at the bottom, select “Link to Section” and add it to the menu with “+ Add” button.
- A new link will be added. From the drop-down menu with “Select Section” placeholder, select the section from which you want to link a list – for example “Schedule”.
- In the second drop-down menu to your right you can now – if necessary – filter with the existing category. Note! If necessary, filter also the general schedule menu with the other category.
- You can now decide whether the link should be displayed on the start page or whether it should only be accessible via the side menu; where the feedback entry should be placed (move it up and down with the drag and drop button) and if you want to set a custom subtitle. Note! The name of the category becomes the name of the menu. This cannot be edited in retrospect.
- Save the link by clicking on “Save Changes” in the upper right corner.
What You Should Have Learned
In this tutorial, we showed you how to link content within the app. Based on four use cases we have explained four different possibilities of linkage.